Stripe ACH in Bubble.io: Master Payments for Your No-Code SaaS


Stripe ACH in Bubble.io: Master Payments for Your No-Code SaaS
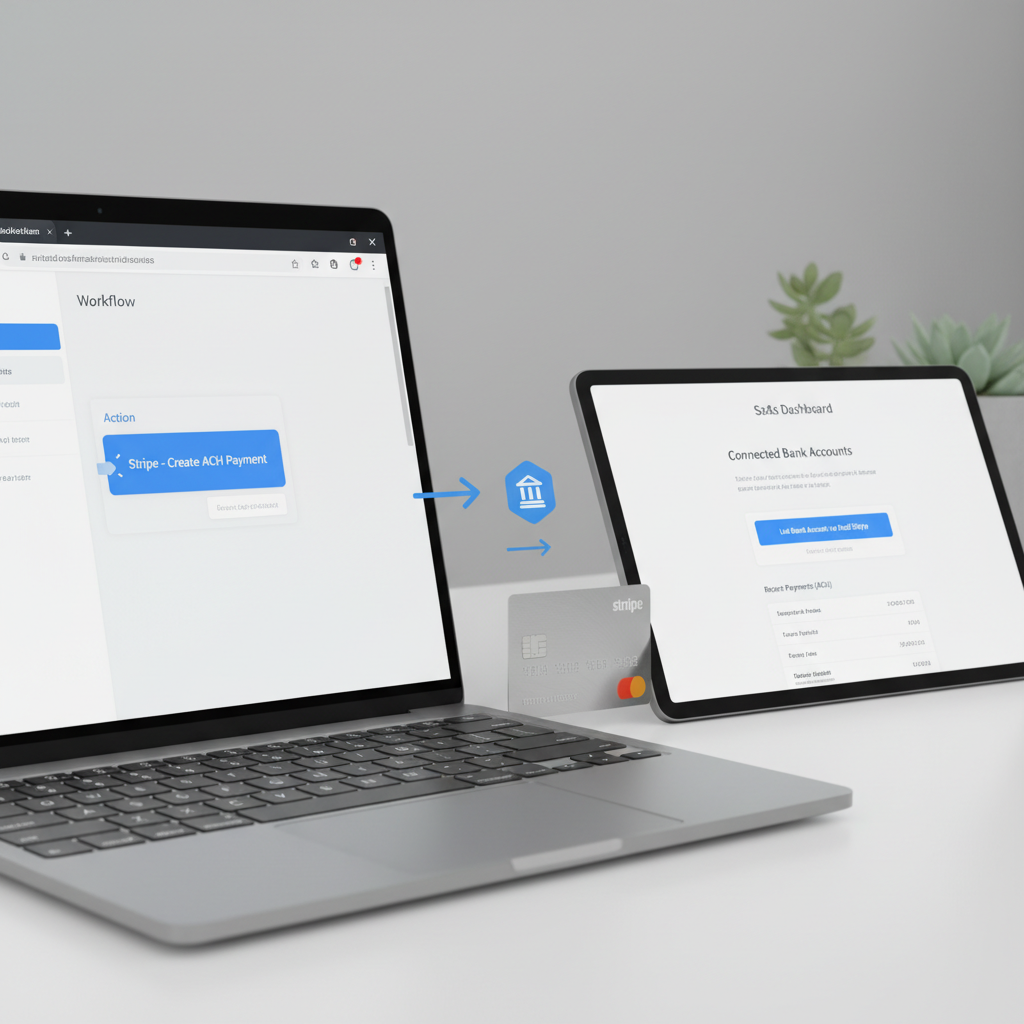
How do I set up Stripe ACH Payments in Bubble.io?
Setting up Stripe ACH Payments in Bubble.io involves configuring your Stripe account for ACH, integrating the official Stripe plugin or API Connector, designing UI elements for bank account collection, and building workflows to create payment methods, verify accounts, and process transactions. This integration is crucial for B2B SaaS and service models, offering lower fees and higher transaction limits compared to credit cards, enhancing financial efficiency for no-code applications.
Key Takeaways
Stripe ACH payments offer significantly lower transaction fees (0.8% capped at $5) and higher transaction limits compared to credit cards, making them crucial for B2B SaaS and high-value services.
To integrate, you must have a fully verified Stripe account with ACH enabled and choose between Bubble's official Stripe plugin for simplicity or the API Connector for granular control over the full Stripe API.
Securely collecting bank account details using Stripe.js elements or Plaid is essential for PCI compliance, followed by mandatory micro-deposit verification workflows in Bubble.
ACH payments are asynchronous, taking 3-5 business days to clear; robust webhook handling in Bubble is critical to update payment statuses and manage lifecycle events like success, failure, and refunds.
Adherence to Nacha Operating Rules for authorization, data security, and dispute resolution, along with thorough testing using Stripe's test bank accounts, is paramount for a compliant and reliable integration.
For no-code startup founders, efficiently managing payment processing is paramount, yet many overlook the strategic advantages of Automated Clearing House (ACH) payments in favor of more common credit card options. To set up Stripe ACH Payments in Bubble.io, you need to configure your Stripe account, integrate the Stripe plugin or API Connector in Bubble, design user interfaces for secure bank account collection, and build robust workflows for creating payment methods, verifying accounts via micro-deposits, and processing transactions. This guide, informed by over five years of experience building 50+ MVPs, emphasizes that integrating ACH early is not merely an advanced feature but a critical competitive differentiator for B2B SaaS and service models seeking lower fees and higher transaction limits, directly enabling faster market validation and scalable growth.
The Unseen Advantage: Why Neglecting ACH Payments Is a Strategic Blunder for No-Code Founders
For many no-code startup founders, the initial focus is often on rapid MVP deployment, prioritizing speed over what might appear to be complex financial integrations. This mindset, while valuable for initial validation, often leads to a critical oversight: the strategic importance of ACH payments. As Devraj Singh, a no-code developer and startup MVP consultant who has guided over 50 MVPs to market, I've observed a pervasive underestimation of ACH's role, particularly for B2B SaaS and high-value service models built on platforms like Bubble.io.
The conventional wisdom often suggests that credit card payments are sufficient for an MVP. However, this perspective fails to account for the substantial financial benefits and market reach that ACH offers. ACH transaction fees are significantly lower than credit card fees, often costing cents per transaction instead of percentages. For instance, Stripe charges 0.8% with a $5 cap for ACH, compared to 2.9% + $0.30 for standard credit card processing. This translates to immense savings, especially for businesses with high average transaction values or recurring revenue models, directly impacting your unit economics and profitability from day one.
Furthermore, ACH transactions typically support much higher limits than credit cards, making them ideal for B2B services, enterprise subscriptions, or large one-time payments. Businesses that rely solely on credit cards risk alienating corporate clients who prefer or mandate ACH for larger invoices. According to Nacha, the governing body for the ACH Network, the network processed 30 billion payments in 2022, totaling $76.7 trillion, demonstrating its pervasive and trusted nature in the US financial landscape. Neglecting this payment rail means voluntarily shrinking your total addressable market and sacrificing potential revenue.
The perceived complexity of integrating ACH into a no-code platform like Bubble.io is often the primary deterrent. Founders might view micro-deposit verification or asynchronous payment flows as daunting technical challenges, pushing them to a later development stage. However, this delay is a strategic misstep. By building a comprehensive MVP that includes robust payment options like ACH from the outset, you not only validate your core business idea but also test its financial viability and scalability under real-world conditions. This approach, which we champion at NoCodeWeb's expertise, ensures your product is not just functional but economically competitive and attractive to a broader client base.
For a B2B SaaS, securing a few high-value clients via ACH can be more impactful for early validation than numerous small credit card transactions. It signals maturity, cost-consciousness, and a commitment to serving enterprise needs. Therefore, understanding how to set up Stripe ACH payments in Bubble.io is not just a technical skill; it's a strategic imperative for any founder serious about building a scalable, financially efficient no-code product.
Prerequisites for Stripe ACH Integration in Bubble.io
Before diving into the detailed setup for Stripe ACH payments in Bubble.io, it's essential to ensure you have the foundational elements in place. These prerequisites will streamline your integration process and prevent common roadblocks.
A Verified Stripe Account
The absolute first step is to have an active and fully verified Stripe account. For ACH payments, Stripe often requires additional verification steps beyond what's needed for basic credit card processing, especially concerning business identity and bank account linking. You'll need to link your business bank account to Stripe and ensure it’s verified for payouts. Stripe's compliance requirements are stringent for ACH, given the direct bank-to-bank nature of these transactions. Ensure your business details, legal entity, and associated bank accounts are accurately registered and approved within your Stripe Dashboard.
During the Stripe account setup, be prepared to provide information such as your Employer Identification Number (EIN) for US businesses, business address, and details of beneficial owners. This verification process can take a few days, so it's advisable to complete it well in advance. Without a fully verified Stripe account with ACH capabilities enabled, you will not be able to process bank transfers.
Understanding Bubble.io Workflows
A fundamental understanding of Bubble.io’s workflow logic is crucial. This includes familiarity with creating new data types, manipulating data, handling user input, and making API calls. While Bubble's visual programming environment simplifies much of the complexity, integrating a sophisticated payment flow like ACH requires a solid grasp of how to chain actions, handle conditional logic, and manage asynchronous events. Specifically, knowing how to use custom states, store temporary data, and respond to various API responses will be key.
Your Bubble application will also need to be on a paid plan. While you can prototype on a free plan, live payment processing, external API integrations (especially for webhooks), and higher workflow capacity typically necessitate a paid Bubble subscription. This ensures you have the necessary server resources and features to handle the intricacies of payment processing reliably.
Legal and Compliance Considerations
Operating in the financial sphere, even through no-code tools, carries legal and compliance obligations. For ACH payments in the United States, you must adhere to Nacha Operating Rules. These rules dictate how ACH payments are initiated, processed, and settled, including requirements for authorization, data security, and dispute resolution. Your application must clearly obtain explicit authorization from users to debit their bank accounts. This typically involves a clear checkbox or statement that the user agrees to the terms and authorizes the payment.
Furthermore, consider data privacy regulations like GDPR (if serving European customers) or CCPA (if serving California residents). While Stripe handles much of the PCI compliance for sensitive card data, you are still responsible for how you handle and store customer data, including bank account information. Ensure your privacy policy is up-to-date and clearly communicates how financial data is collected, used, and protected. Consulting with a legal professional specializing in FinTech or e-commerce is highly recommended to ensure full compliance.
Configuring Your Stripe Account for ACH Payments
Proper configuration of your Stripe account is the bedrock of successful ACH integration. This involves enabling the correct features and setting up the communication channels that will allow Stripe and your Bubble app to work seamlessly.
Enabling ACH Debits in Stripe
By default, ACH payments might not be fully enabled for all new Stripe accounts. To enable ACH debits, navigate to your Stripe Dashboard. Go to the "Settings" section, then "Payment Methods." Here, you will find a list of available payment methods. Locate "Bank debits" (which includes ACH) and ensure it is activated. Stripe may prompt you to complete additional verification steps if you haven't already. This could involve confirming business details, providing additional documentation, or undergoing a review process.
It's crucial to understand the implications of enabling ACH. Unlike credit cards, ACH payments are not instant. They typically take 3-5 business days to clear. Stripe provides tools to manage the risk associated with this delay, but it's a factor to communicate clearly to your users. For detailed information, always refer to Stripe's official ACH documentation.
Understanding Connected Accounts and Platforms
If your no-code SaaS operates as a platform that facilitates payments between multiple users (e.g., a marketplace or booking platform), you'll likely use Stripe Connect. For platforms, you'll need to decide between Standard, Express, or Custom Connect accounts. Each type has different responsibilities for KYC (Know Your Customer) and compliance. Ensuring ACH is enabled for your connected accounts is critical. This typically means that each connected account must also be verified by Stripe to accept bank debits. This adds a layer of complexity but is essential for robust platform functionality. For most direct-to-customer SaaS applications, a standard Stripe account is sufficient, and connected accounts are not necessary.
Setting Up Stripe Webhooks
ACH payments are inherently asynchronous. This means that a payment isn't confirmed instantly; its status changes over several days (pending, succeeded, failed). To keep your Bubble application updated on these status changes, you must set up Stripe webhooks. Webhooks are automated messages sent by Stripe to a URL you specify whenever an event occurs in your Stripe account.
In your Stripe Dashboard, navigate to "Developers" > "Webhooks." Click "Add endpoint" and provide a URL from your Bubble app that can receive these POST requests. For example, your Bubble app might have a backend workflow endpoint like `https://yourapp.bubbleapps.io/version-test/api/1.1/wf/stripe_webhook`. Crucial events to listen for include `payment_intent.succeeded`, `payment_intent.payment_failed`, `charge.succeeded`, `charge.failed`, and `charge.refunded`. You'll also need to verify the webhook signature to ensure the requests are genuinely from Stripe and not malicious.
The webhook secret is vital for security. Stripe sends a unique signature with each webhook event, which your Bubble backend workflow must verify using the secret key. This prevents unauthorized requests from triggering actions in your application. Implementing robust webhook handling is non-negotiable for reliable ACH processing, as it forms the backbone of real-time status updates.
Test Mode vs. Live Mode for ACH
Stripe offers both a test mode and a live mode. Always begin your ACH integration in test mode. This allows you to simulate transactions without affecting real money or bank accounts. Stripe provides specific test bank account numbers, routing numbers, and micro-deposit amounts to fully simulate the entire ACH flow, including verification and various success/failure scenarios. This is critical for thorough testing before deploying to production.
When switching to live mode, remember to update all API keys (secret key, publishable key) in your Bubble application from test keys to live keys. Also, ensure your webhooks are configured for the live environment. Forgetting to switch keys or reconfigure webhooks is a common error that can lead to significant headaches during deployment.
Choosing Your Integration Path: Stripe Plugin vs. Bubble API Connector
When integrating Stripe with Bubble, you essentially have two primary routes: leveraging Bubble's official Stripe plugin or using the more versatile Bubble API Connector. Each approach has distinct advantages and trade-offs, making the choice critical based on your project's complexity and your desired level of control.
The Official Stripe Plugin for Bubble
The official Stripe plugin, maintained by Bubble, is often the simplest and fastest way to get started with payment processing. It provides pre-built actions and data calls that abstract away much of the underlying API complexity. For basic credit card payments and standard ACH functionalities, it can be incredibly efficient. The plugin typically handles tokenization of sensitive payment information (like bank account details) directly from your front-end UI, ensuring PCI compliance by never letting raw sensitive data touch your Bubble server.
**Pros of the Stripe Plugin:**
Ease of Use: Pre-configured actions like "Create a customer," "Charge the current user," or "Create a payment method" simplify workflow creation.
Faster Setup: For standard use cases, you can set up basic payment flows in minutes, ideal for rapid MVP iteration.
PCI Compliance: The plugin uses Stripe.js elements that handle sensitive data securely on Stripe's servers, minimizing your compliance burden.
Maintained by Bubble: Regular updates and compatibility with Bubble's core platform.
**Cons of the Stripe Plugin:**
Limited Flexibility: It may not expose every single Stripe API endpoint or parameter. If you need a very specific feature or a nuanced part of the Stripe API, the plugin might not support it directly.
Less Granular Control: Custom error handling or complex conditional logic based on specific Stripe responses can be more challenging to implement.
Dependency: You are reliant on Bubble to update the plugin for new Stripe features or API changes.
For ACH, the plugin often provides actions to create bank account tokens and attach them to customers, and then create charges or payment intents. However, advanced features like managing micro-deposit verification or handling certain webhook events might require workarounds or supplementary API Connector calls.
The Bubble API Connector for Granular Control
The Bubble API Connector allows you to directly interact with any external API, including the full Stripe API. This method offers unparalleled flexibility and control, enabling you to implement virtually any Stripe feature. While it requires a deeper understanding of the Stripe API documentation and JSON structures, it empowers you to build highly customized payment experiences.
**Pros of the API Connector:**
Full Stripe API Access: You can call any Stripe endpoint, allowing for custom implementations of even the most obscure features.
Maximum Flexibility: Complete control over parameters, headers, and data structures. Ideal for complex use cases like custom Stripe Connect implementations, highly specific ACH scenarios, or integrating newer beta features.
Precise Error Handling: You can parse detailed error messages from Stripe and provide highly specific feedback to users.
Independent Updates: You are not reliant on a plugin update to access new Stripe features; you can implement them as soon as they are documented.
**Cons of the API Connector:**
Steeper Learning Curve: Requires familiarity with REST APIs, JSON, and Stripe's extensive documentation.
More Setup Time: Each API call (e.g., create customer, create payment method, create charge) needs to be configured manually.
PCI Compliance Management: While Stripe.js is still used for tokenizing sensitive data, ensuring full PCI compliance for your overall data flow requires careful attention. You must never handle raw bank account numbers or sensitive card details directly on your Bubble server.
Maintenance: You are responsible for keeping your API calls updated if Stripe changes its API (though this is rare for stable endpoints).
For ACH, the API Connector is often preferred for managing the entire micro-deposit verification flow, handling `PaymentIntent` objects with ACH, and setting up custom webhook listeners for various ACH status updates. You can define specific API calls for: creating a bank account source, attaching it to a customer, initiating micro-deposits, verifying micro-deposits, and then creating charges or subscriptions using the verified bank account. This level of detail allows for a much more robust and error-resilient integration.
When to Use Which: A Strategic Decision
The choice between the plugin and API Connector is a strategic one, often dictated by your project's current stage and future ambitions. For a straightforward MVP focusing on initial validation with minimal custom payment logic, the official Stripe plugin can get you to market fastest. It's excellent for basic ACH debit creation and linking to customers.
However, if your no-code SaaS anticipates complex payment flows, requires advanced ACH functionalities (like specific risk controls, multi-party payments, or detailed subscription prorations), or if you foresee needing to react dynamically to every possible Stripe event, the API Connector is the superior choice. It provides the necessary power and flexibility to build a truly scalable and resilient payment infrastructure. Many experienced no-code developers, including those at NoCodeWeb, opt for a hybrid approach: using the plugin for basic, client-side tokenization and the API Connector for server-side actions, webhooks, and advanced payment logic.
Ultimately, for robust ACH integration that covers all edge cases, especially the asynchronous nature of bank transfers and micro-deposit verification, the API Connector (or a combination with the plugin for front-end elements) offers the most reliable and future-proof solution. This approach aligns with the objective of building a scalable SaaS without coding, as discussed in our article on how to build SaaS without coding.
Designing the User Interface (UI) for ACH Bank Account Collection
The user interface (UI) for collecting bank account information is not just about aesthetics; it's about security, trust, and compliance. Given the sensitive nature of financial data, a well-designed UI can significantly impact user adoption and reduce abandonment rates. Stripe provides various options, from hosted solutions to customizable elements, to help you create a secure and user-friendly experience.
Securely Collecting Bank Details
The most secure and recommended way to collect bank account details is by using Stripe.js elements or a partner like Plaid. These methods ensure that sensitive information (bank account number, routing number) never touches your Bubble server, offloading PCI compliance responsibilities. Stripe.js elements render secure input fields directly from Stripe's servers onto your Bubble page.
Stripe.js Bank Account Element: This element allows users to input their bank name, account number, and routing number directly into fields hosted by Stripe. You then receive a token representing this bank account, which you use in your backend workflows. This is the most common and secure method.
Plaid Integration: For an even smoother user experience, consider integrating Plaid (or similar services like Finicity). Plaid allows users to log in directly to their bank account through a secure pop-up, instantly verifying their account and bypassing manual entry and micro-deposits. This significantly reduces friction and improves conversion. Integrating Plaid into Bubble typically involves using the API Connector to interact with Plaid's API, then passing the generated bank token to Stripe. While more complex to set up, the UX benefits are substantial.
Regardless of the method, ensure your UI clearly indicates that the bank details are processed securely and powered by Stripe. This builds trust and alleviates user concerns about providing sensitive financial information.
Implementing Micro-Deposit Verification UI
If you opt for manual bank account entry (without Plaid), micro-deposit verification is a critical step. Stripe will send two small deposits (e.g., $0.05 and $0.13) to the user's bank account, usually within 1-2 business days. The user then needs to confirm these amounts in your application to verify ownership of the account. Your UI must accommodate this process:
Initial Submission State: After the user submits their bank details, show a message confirming that deposits have been initiated and instruct them to check their bank statement in 1-2 days.
Verification Input: Provide a dedicated section or modal where users can enter the two micro-deposit amounts once they appear on their statement.
Status Updates: Clearly communicate the status of their bank account verification (e.g., "Pending Verification," "Verified," "Verification Failed").
Make this process as intuitive as possible. Send email notifications to remind users to verify their accounts, as this step is a common point of abandonment. Use conditional visibility in Bubble to show/hide relevant UI elements based on the bank account's verification status stored in your database.
User Consent and Terms of Service
Explicit authorization is a legal requirement for ACH debits. Your UI must clearly present terms and conditions related to ACH payments and obtain explicit consent from the user. This typically involves:
A checkbox that the user must tick, stating something like, "I authorize [Your Company Name] to debit my bank account for payments, as per the Terms of Service and Privacy Policy."
A clear statement about the nature of ACH payments, including their non-instantaneous settlement time and any potential fees (e.g., for insufficient funds).
Information about how users can revoke authorization or manage their payment methods.
The language should be clear, concise, and easily understandable. Avoid legal jargon where possible, or provide simplified explanations. Ensure your terms of service explicitly cover your ACH payment policy.
UX Best Practices for Financial Data
Beyond security and compliance, a thoughtful UX design enhances trust and reduces user anxiety. Consider these best practices:
Clear Labeling: Use straightforward labels for input fields (e.g., "Bank Name," "Account Number," "Routing Number").
Input Validation: Provide real-time feedback on input validity (e.g., invalid routing number format).
Progress Indicators: For multi-step processes like micro-deposit verification, show users where they are in the process.
Error Messages: Display user-friendly and actionable error messages, avoiding technical jargon.
Mobile Responsiveness: Ensure the UI is fully responsive and optimized for mobile devices, as many users will interact with your application on their phones.
Confirmation Screens: After successful bank account linking or payment initiation, provide a clear confirmation screen.
A well-executed UI for ACH not only fulfills legal requirements but also contributes significantly to a professional and trustworthy image for your no-code SaaS, encouraging greater customer confidence and retention.
Building Bubble.io Workflows: Step-by-Step ACH Integration
This section delves into the core of integrating Stripe ACH with Bubble.io: building the workflows. We'll break down the process into four critical phases, covering everything from collecting bank details to processing actual payments and handling refunds.
Phase 1: Collecting and Tokenizing Bank Account Information
The first step is to securely collect the user's bank account information and convert it into a Stripe token. This token represents the bank account without exposing sensitive details to your Bubble application.
UI Setup: On your Bubble page, add input elements for 'Bank Name', 'Account Number', and 'Routing Number'. Crucially, for security and PCI compliance, these should ideally be part of a Stripe.js element or processed via an intermediary like Plaid. If using the official Stripe plugin, drag the 'Stripe.js' element onto your page.
Workflow Trigger: Create a workflow that triggers when the user clicks a 'Save Bank Account' or 'Add Payment Method' button.
Action: Create a Bank Account Token:
Using the Stripe plugin: Use the action 'Stripe - Create a Bank Account Token'. Map the input fields (Account Number, Routing Number, Account Holder Name, Account Holder Type, Country, Currency) to the corresponding values from your UI.
Using API Connector: Configure an API call to Stripe's 'Create a Token' endpoint (`POST /v1/tokens`). The body should include `bank_account[country]=US`, `bank_account[currency]=usd`, `bank_account[account_holder_name]=...`, `bank_account[account_number]=...`, `bank_account[routing_number]=...`. Make sure this call is client-side if possible, or ensure your server-side call is secure and temporary.
Action: Create a Customer or Update Customer: Once you have the bank account token (e.g., `tok_XXXX`), you need to associate it with a Stripe Customer. If the user is new, create a new Stripe Customer using the 'Stripe - Create a Customer' action (plugin) or `POST /v1/customers` (API Connector). Store the `customer_id` in your Bubble database (e.g., on the `User` data type). If the user already has a Stripe Customer ID, use 'Stripe - Update Customer' or `POST /v1/customers/{customer_id}` to add the new payment method.
Action: Attach Payment Method: Use 'Stripe - Attach Payment Method to Customer' (plugin) or `POST /v1/payment_methods/{payment_method_id}/attach` (API Connector). The bank account token from the previous step will be used to create a `PaymentMethod` object, which is then attached to the `Customer`. Store the `payment_method_id` in your Bubble database, linked to the user.
Database Update: Save the `customer_id` and the `payment_method_id` to your Bubble User data type or a dedicated `PaymentMethod` data type. Also, save the bank account's verification status (initially 'unverified').
This phase securely captures and stores the bank account information as a reusable payment method for future transactions.
Phase 2: Verifying Bank Accounts via Micro-Deposits
For manually entered bank accounts, verification via micro-deposits is mandatory. This process confirms the user owns the bank account.
Initiate Micro-deposits: Stripe automatically initiates two small deposits to the bank account after it's attached as a payment method. No specific Bubble workflow action is usually needed to *initiate* them, but you need to handle the verification.
UI for Verification: Create a section in your UI where users can input the two small amounts they received in their bank account. This section should only be visible if the `payment_method`'s status in your database is 'pending_verification'.
Workflow Trigger: When the user submits the two micro-deposit amounts, trigger a workflow.
Action: Verify Bank Account:
Using the Stripe plugin: Use the action 'Stripe - Verify Bank Account'. Provide the `payment_method_id` (from your database) and the two amounts entered by the user.
Using API Connector: Configure an API call to Stripe's 'Verify a bank account' endpoint (`POST /v1/payment_methods/{payment_method_id}/verify`). The body should include the two `amounts` as an array (e.g., `amounts[]=5&amounts[]=13` for $0.05 and $0.13).
Handle Response:
If successful, Stripe will update the `payment_method`'s status to 'verified'. Your Bubble webhook (configured in Stripe) will receive a `payment_method.updated` event.
Update your Bubble database: Set the `payment_method`'s status to 'verified'. This will allow you to proceed with payments.
If verification fails (e.g., incorrect amounts), Stripe will return an error. Update your UI to inform the user and allow them to re-enter the amounts or try again.
This asynchronous process requires clear communication with the user and robust webhook handling to update statuses correctly.
Phase 3: Processing ACH Payments and Charges
Once the bank account is verified, you can initiate ACH payments. Stripe recommends using `PaymentIntents` for most new integrations, as they handle the lifecycle of a payment more robustly.
Workflow Trigger: When a user initiates a payment (e.g., clicks 'Pay Now' for a subscription or one-time charge).
Action: Create a Payment Intent:
Using the Stripe plugin: Use 'Stripe - Create a Payment Intent'. Specify the `amount`, `currency` (e.g., 'usd'), `payment_method_types` (set to `ach_debit`), and `customer_id`.
Using API Connector: Configure an API call to `POST /v1/payment_intents`. Parameters: `amount`, `currency=usd`, `payment_method_types[]=ach_debit`, `customer={customer_id}`, `payment_method={payment_method_id}`. Set `confirm=true` to confirm it immediately.
Handle Response: Stripe will return a `PaymentIntent` object. Store the `payment_intent_id` and its `status` (initially `processing` or `requires_action` for micro-deposits, but here, it should typically move to `processing` if verified).
Webhook for Status Updates: Since ACH is asynchronous, the `PaymentIntent` status will change over several days. Your Bubble backend workflow, listening for `payment_intent.succeeded` and `payment_intent.payment_failed` webhooks, is crucial here.
When `payment_intent.succeeded` is received, update your Bubble database to mark the payment as 'paid' or 'succeeded'. Trigger actions like sending confirmation emails, updating subscription statuses, etc.
When `payment_intent.payment_failed` is received, update the payment status to 'failed'. This could be due to insufficient funds (NSF), account closed, etc. Implement logic to notify the user, attempt re-collection, or cancel subscriptions.
UI Feedback: Immediately after initiating payment, show a message indicating that the payment is 'processing' and will clear in a few business days. Provide clear instructions on how they will be notified of success or failure.
This phase is the culmination of your setup, allowing you to collect actual funds through ACH.
Phase 4: Handling ACH Refunds and Disputes
While not always part of an initial MVP, robust refund handling is essential for customer satisfaction and compliance.
Refund Workflow Trigger: Create a workflow triggered by an admin action (e.g., clicking a 'Refund' button in an admin panel).
Action: Create a Refund:
Using the Stripe plugin: Use 'Stripe - Refund a Charge'. Provide the `charge_id` or `payment_intent_id` of the original transaction and the `amount` to refund.
Using API Connector: Configure an API call to `POST /v1/refunds`. Parameters: `payment_intent={payment_intent_id}` or `charge={charge_id}`, `amount={amount_in_cents}`.
Handle Response: Stripe will process the refund. Refunds typically take 5-10 business days to appear on the customer's statement.
Webhook for Refund Status: Listen for `charge.refunded` or `payment_intent.refunded` webhooks to update your Bubble database with the refund status.
Dispute Management: ACH payments are subject to disputes (chargebacks). Your Stripe Dashboard will notify you of these. Implement internal procedures to respond to disputes promptly, providing evidence to Stripe. While not a direct Bubble workflow, your app should ideally store sufficient transaction details to support dispute resolution.
Properly implemented, these workflows enable your Bubble application to manage the entire lifecycle of an ACH payment, from initiation to settlement and potential refunds, fostering trust and operational efficiency.
Advanced ACH Scenarios: Subscriptions, One-Time, and Platform Payments
Beyond basic ACH debits, Stripe's robust API allows for more sophisticated use cases crucial for many no-code SaaS businesses. Understanding these advanced scenarios can significantly expand your application's capabilities.
Integrating ACH with Stripe Subscriptions
ACH is an excellent payment method for recurring billing, especially for SaaS models where lower transaction fees can dramatically improve margins. Integrating ACH with Stripe Subscriptions in Bubble.io follows a similar pattern to one-time payments, but with key differences.
Customer and Payment Method Setup: First, ensure the user's bank account is collected and verified, and a `PaymentMethod` of type `ach_debit` is attached to their Stripe `Customer` (as described in Phase 1 and 2).
Create a Subscription:
Using the Stripe plugin: Use the 'Stripe - Create a Subscription' action. Specify the `customer_id`, `price_id` (from your Stripe Products/Prices), and set the `default_payment_method` to the `payment_method_id` of the verified ACH bank account.
Using API Connector: Make a `POST /v1/subscriptions` call. Parameters include `customer={customer_id}`, `items[][price]={price_id}`, and `default_payment_method={payment_method_id}`.
Handle Asynchronous Payments: Subsequent subscription payments will automatically attempt to debit the ACH account. Crucially, your webhook handling (specifically for `invoice.payment_succeeded`, `invoice.payment_failed`, `customer.subscription.updated`, etc.) becomes even more critical to keep your Bubble app synchronized with the subscription status.
Dunning Management: Implement a dunning strategy for failed ACH subscription payments. Stripe offers built-in smart retries, but your Bubble app should have workflows to notify users of failed payments, prompt them to update payment methods, or pause/cancel subscriptions after multiple failures.
Using ACH for subscriptions offers reliability and cost savings, making it a powerful tool for your recurring revenue streams.
Processing One-Time ACH Charges
While the previous section on Phase 3 covered creating `PaymentIntents` for general payments, it's worth reiterating the simplicity of one-time ACH charges once a bank account is verified. This is suitable for single purchases, initial setup fees, or non-recurring services.
Ensure Verified Payment Method: The user must have a verified `ach_debit` `PaymentMethod` attached to their `Customer` object.
Create Payment Intent: Trigger a workflow to create a `PaymentIntent` as described in Phase 3. Set `amount`, `currency`, `customer_id`, and `payment_method_id`.
Confirmation and Webhook Monitoring: Confirm the `PaymentIntent` and monitor its status via webhooks. The payment will remain in a `processing` state for several days before moving to `succeeded` or `failed`.
The key here is the `payment_method_id`. Once you have a verified one, initiating subsequent one-time ACH charges is straightforward, provided you have the appropriate `Customer` and `PaymentMethod` IDs stored in your Bubble database.
Stripe Connect for Platform ACH Payments
For no-code platforms (e.g., marketplaces, booking platforms) that need to facilitate payments between users and distribute funds, Stripe Connect is the solution. Integrating ACH within Connect allows your platform users to accept bank debits.
Onboarding Connected Accounts: Your platform's onboarding process must include connecting user accounts to Stripe. For each connected account, ensure ACH debits are enabled and verified. This usually involves directing users to Stripe Connect's OAuth flow or embedded onboarding.
Collecting ACH for Connected Accounts: When a buyer pays a seller on your platform via ACH, the bank account details are associated with the `connected_account` (the seller's Stripe account) rather than your platform's direct account. You'd typically create a `PaymentIntent` on behalf of the connected account, specifying the `transfer_data` if funds need to be split immediately, or using `destination` charges.
Webhooks for Platform: Your platform needs to listen to webhooks from both your main Stripe account and potentially from connected accounts (depending on your Connect type) to track payment statuses, transfers, and payouts for all parties involved. This adds significant complexity to webhook management.
Stripe Connect with ACH enables powerful platform models, but it requires careful planning for onboarding, payment routing, and robust webhook processing to manage the flow of funds accurately between multiple parties.
Error Handling, Security, and Compliance for ACH Payments
Implementing ACH payments goes beyond just functionality; it demands meticulous attention to error handling, robust security measures, and strict adherence to compliance regulations. Neglecting these aspects can lead to financial losses, reputational damage, and legal repercussions.
Managing Common ACH Error Codes
ACH payments, being asynchronous, can fail for various reasons. Stripe provides specific error codes that your Bubble application should be equipped to interpret and act upon. Proper error handling involves displaying user-friendly messages and, where possible, suggesting corrective actions.
Insufficient Funds (NSF): This is a common failure reason. Stripe returns a `declined` status with a relevant error code. Your system should notify the user and prompt them to update their payment method or retry the payment after funds are available.
Bank Account Closed/Invalid: If an account is closed or the details are incorrect, the payment will fail. Inform the user to provide new bank details.
Authorization Revoked: The user may have revoked the authorization to debit their account. This requires re-obtaining consent.
Dishonored Returns: In rare cases, a bank might initially accept a debit but later return it. Your webhook handling must be prepared for these unexpected reversals.
For each potential error, design a Bubble workflow that updates the payment status in your database, sends a notification (email, in-app), and guides the user toward resolution. Good error handling significantly improves the user experience and reduces churn, especially for subscription services.
PCI Compliance and Data Security
While Stripe is responsible for the bulk of PCI DSS (Payment Card Industry Data Security Standard) compliance for sensitive card data, you still have obligations when handling any financial information, including bank account details. The critical principle is to never store raw sensitive data on your Bubble server. By using Stripe.js elements for bank account collection, you ensure that sensitive numbers are tokenized directly on Stripe's secure infrastructure.
Tokenization: Always use Stripe's tokenization process for bank accounts. This means your Bubble app only handles a `payment_method_id` or `token_id`, not the actual account and routing numbers.
Secure Data Storage: Any non-sensitive customer data stored in Bubble (e.g., customer names, payment history) should be protected with appropriate Bubble privacy rules to restrict access.
HTTPS: Ensure your Bubble app always uses HTTPS to encrypt all communication between the user's browser and your application. Bubble provides this by default.
Webhook Security: As mentioned, always verify webhook signatures to confirm events originate from Stripe, preventing spoofed requests from triggering false actions in your app.
Prioritizing security builds trust with your users and protects your business from data breaches and compliance violations. A breach of financial data can be devastating for a startup's reputation and financial stability.
Nacha Rules and Regulations for ACH
The National Automated Clearing House Association (Nacha) governs the ACH Network in the United States. Adherence to Nacha Operating Rules is mandatory for anyone initiating ACH debits. These rules cover various aspects, including:
Authorization: You must obtain explicit, verifiable authorization from the account holder before initiating an ACH debit. This includes electronic signatures or clear acceptance of terms.
Retention: You must retain proof of authorization for at least two years after the authorization is revoked or the last payment is made.
Returns and Reversals: Understanding the timeframes and reasons for ACH returns (e.g., unauthorized debit, insufficient funds) is crucial for managing your financial operations.
Customer Service: You must provide a clear and accessible method for customers to contact you regarding payment inquiries or disputes.
While Stripe helps facilitate compliance, the ultimate responsibility for obtaining and retaining proper authorization lies with you, the merchant. Familiarize yourself with the Nacha Operating Rules to ensure your practices are fully compliant. Non-compliance can lead to hefty fines and loss of ACH processing privileges.
Fraud Prevention Strategies
ACH payments, like any payment method, are susceptible to fraud. While they generally have lower fraud rates than credit cards, you should still implement preventive measures.
Address Verification: Match the billing address provided by the user with the address associated with their bank account.
Transaction Monitoring: Monitor for unusual transaction patterns, such as sudden large payments or multiple failed attempts from the same IP address.
Account Age: For high-value transactions, consider putting a hold on funds for newer accounts or requiring additional verification.
Stripe Radar: Leverage Stripe's built-in Radar for fraud prevention. While primarily for cards, it can help identify suspicious activity across your payment ecosystem.
A multi-layered approach to security and compliance, combining Stripe's robust infrastructure with diligent practices within your Bubble application, will protect your business and foster trust with your users.
Testing Your Stripe ACH Integration in Bubble.io
Thorough testing is non-negotiable for any payment integration, especially with ACH, due to its asynchronous nature and potential for various failure scenarios. Stripe provides comprehensive tools to simulate the entire ACH lifecycle without involving real money or bank accounts.
Utilizing Stripe Test Bank Accounts
In Stripe's test mode, you can use specific test bank account numbers and routing numbers to simulate different outcomes. These are crucial for verifying that your Bubble workflows correctly handle success and various failure states.
Successful Debit: Use a test bank account that will always succeed to confirm your payment processing workflows (e.g., updating payment status, sending confirmation emails).
Insufficient Funds (NSF): Use a test bank account designed to simulate NSF to verify your error handling, user notifications, and retry logic.
Account Closed: Simulate an account that is closed to ensure your system correctly identifies and reports this failure.
Unauthorized: Test scenarios where the debit is reported as unauthorized by the bank.
Stripe's documentation provides a list of these specific test values. Input these into your Bubble UI during testing to trigger the corresponding outcomes. This allows you to walk through every path your payment workflow might take.
Simulating Micro-Deposit Verification
Micro-deposit verification is a critical, multi-day process that must be thoroughly tested. Stripe allows you to simulate the amounts deposited and the verification attempt.
Initiate Test Deposits: When you attach a test bank account that requires micro-deposit verification, Stripe will simulate sending these deposits.
Retrieve Test Amounts: In your Stripe Dashboard, navigate to the test bank account's details. You'll find the specific two micro-deposit amounts that Stripe "sent."
Verify in Bubble: In your Bubble application, use the UI you built for micro-deposit verification and enter these exact test amounts.
Check Workflow: Verify that your Bubble workflow correctly calls the Stripe API to confirm the amounts and that the `payment_method`'s status updates to 'verified' in your database and via webhooks.
Testing this flow ensures that your user onboarding for ACH is smooth and functional, minimizing friction for legitimate users.
Comprehensive Workflow Testing
Beyond individual payment stages, test the entire end-to-end user journey and all associated backend processes:
User Onboarding: Test the flow from a new user signing up, adding a bank account, and completing verification.
Subscription Setup: If applicable, ensure ACH subscriptions are created correctly and that recurring payments are simulated through Stripe's test environment.
Webhook Handling: Crucially, test all your webhook backend workflows. Use Stripe's webhook testing tools in the Developer Dashboard to manually trigger specific events (e.g., `payment_intent.succeeded`, `payment_intent.payment_failed`, `charge.refunded`) and verify that your Bubble app reacts as expected, updating data and triggering subsequent actions.
Refunds: Test the refund process for both successful and failed payments.
Error Messages: Ensure that all custom error messages in your UI are triggered correctly and are helpful to the user.
Admin Panel Actions: If you have an admin panel for managing payments, test all actions (e.g., initiating refunds, viewing payment statuses) to ensure they interact correctly with Stripe and your Bubble database.
Document your testing process and expected outcomes. A robust testing phase will catch most integration issues before they impact your live users, saving you significant time and potential financial losses down the line.
Optimizing for Scale and User Experience
Once your Stripe ACH integration in Bubble.io is functional, the next step is to optimize it for long-term scalability and an exceptional user experience. A well-optimized system not only handles increased load efficiently but also delights users, fostering loyalty and growth.
Performance Considerations in Bubble
Bubble's performance can be affected by complex workflows and excessive data queries. When dealing with payments, efficiency is key:
Backend Workflows: Leverage Bubble's backend workflows (server-side workflows) for all Stripe API calls that don't require direct user interaction. This offloads processing from the client's browser, improving UI responsiveness and security.
Database Queries: Minimize redundant database queries. Fetch `customer_id` and `payment_method_id` once and store them efficiently. Use custom states sparingly for temporary data, preferring database storage for persistent payment methods.
Efficient Webhook Processing: Ensure your webhook backend workflows are lean and execute quickly. Avoid complex calculations or heavy data manipulation directly within the webhook, as this can lead to timeouts and missed events. Prioritize updating critical payment statuses and then trigger separate, less time-sensitive workflows for other actions.
Asynchronous Operations: Embrace the asynchronous nature of ACH. Instead of waiting for a payment to clear, immediately confirm receipt to the user and update status via webhooks. This provides a smoother experience than making users wait for a multi-day bank transfer.
By carefully structuring your Bubble application, you can ensure that your ACH payment system remains performant even as your user base and transaction volume grow.
Iterative Improvements and User Feedback
Your payment integration should not be a static component. Continuously gather user feedback and iterate on your UI/UX:
A/B Testing: Experiment with different layouts for bank account collection, wording for authorization, or micro-deposit verification flows. Even small changes can significantly impact conversion rates.
User Interviews: Conduct interviews with users who have gone through the ACH payment process. Identify pain points, confusion, or areas of friction.
Support Tickets: Monitor support tickets related to payments. Recurring issues indicate areas that need immediate attention and improvement in your workflows or UI.
Based on working with numerous B2B SaaS startups at nocodeweb.agency, we've found that even seemingly minor tweaks to the payment experience can lead to substantial improvements in user satisfaction and revenue capture. An evolving payment system is a healthy one.
Monitoring and Analytics for Payment Health
Implement robust monitoring and analytics to keep a pulse on your payment system's health:
Stripe Dashboard: Regularly review your Stripe Dashboard for failed payments, disputes, and payout statuses. This is your primary source of truth for financial transactions.
Bubble Logs: Utilize Bubble's server logs for backend workflows to troubleshoot issues and track the execution of your payment logic.
Custom Dashboards: Build internal dashboards in Bubble to display key payment metrics (e.g., successful ACH payments, failed payments by reason, average settlement time). This provides quick insights into the performance of your payment gateway.
Alerts: Set up alerts for critical events, such as a sudden spike in failed payments or an increase in disputes. Early detection allows for rapid response and mitigation of potential issues.
Proactive monitoring ensures that you can identify and resolve issues before they escalate, maintaining the integrity and reliability of your ACH payment processing system. This level of diligence is what differentiates a robust no-code SaaS from a fragile one.
Conclusion: The Future of No-Code Financial Efficiency
Integrating Stripe ACH payments in Bubble.io is more than a technical exercise; it's a strategic move that positions your no-code SaaS for greater financial efficiency, broader market acceptance, and enhanced scalability. By embracing ACH early, you unlock lower transaction costs, support higher payment volumes, and cater to a B2B clientele that often prefers direct bank transfers. The perceived complexity is easily overcome with careful planning, robust workflow design, and a commitment to secure, compliant practices.
As the no-code landscape continues to mature, the expectation for sophisticated functionality in MVPs grows. Founders who strategically integrate advanced payment options like ACH will not just validate their ideas faster but will build more resilient and profitable businesses. The future of no-code is not just about building fast; it's about building smart, and mastering Stripe ACH in Bubble.io is a testament to that philosophy.
Frequently Asked Questions
Why should a no-code SaaS founder prioritize Stripe ACH integration?
No-code SaaS founders should prioritize Stripe ACH integration for significantly lower transaction fees (e.g., 0.8% capped at $5 vs. credit card percentages), higher transaction limits, and to cater to B2B clients who often prefer or require bank transfers. This directly impacts profitability and expands market reach for high-value services.
What are the key steps to set up Stripe ACH in Bubble.io?
The key steps involve verifying your Stripe account for ACH, choosing between Bubble's Stripe plugin or API Connector, designing a secure UI for bank account collection, building Bubble workflows for tokenization, micro-deposit verification, and payment processing, and setting up Stripe webhooks for status updates.
Is micro-deposit verification always required for Stripe ACH in Bubble.io?
Yes, micro-deposit verification is generally required for ACH payments when users manually enter their bank account and routing numbers. This process confirms the user's ownership of the bank account. Alternatives like Plaid can bypass manual entry and micro-deposits by allowing users to securely link their bank accounts directly.
How long do Stripe ACH payments take to process in Bubble.io?
Stripe ACH payments are asynchronous and typically take 3-5 business days to clear and settle. Your Bubble application needs to handle this delay by showing 'processing' statuses and updating payment records via Stripe webhooks when the final status (succeeded or failed) is confirmed.
What are the compliance considerations for ACH payments in a Bubble.io app?
Compliance for ACH payments involves adhering to Nacha Operating Rules, which mandate explicit authorization from users to debit their accounts and proper record retention. Additionally, data security (using Stripe.js for tokenization) and general data privacy regulations (like GDPR/CCPA) must be considered, with a clear privacy policy.
Devraj Singh
Devraj Singh is a no-code developer and startup consultant who helps founders turn their ideas into scalable products without traditional coding. With over five years of experience and more than 50 MVPs built for global clients, he specializes in rapid product development using platforms like Bubble.io. Arjun works closely with entrepreneurs to validate ideas, build efficient systems, and launch products faster, making him a trusted partner for early-stage startups looking to grow quickly and cost-effectively.